Identify headings, lists, and tables

Identifying headings, lists, and tables not only ensures that people have access to that important structural information, but assistive technologies like screen readers can help users easily locate these features and navigate between and within them. By adding structure, you automatically make it easier for screen-reader users to explore and understand your content.

Avoid using structural elements for anything other than their intended use. For example, do not use table elements for layout, such as to create columns. Screen-reader software announces the structure of a table and users may believe they are navigating through tabular data when they are not.

  • Mark up information structure using heading levels. When you add headings for sections of content, make sure they’re identified as headings. Styling text to be bigger and bolder than the rest may make it look like a heading, but for people who don’t see that visual change the text won’t be identifiable as a heading.
  • Mark up ordered and unordered lists. If you have content that’s a list, identify it as a list in markup. Don’t use asterisks, dashes, or numbers as lists item markers. If you use proper list markup, bullets or numbers will be added automatically.
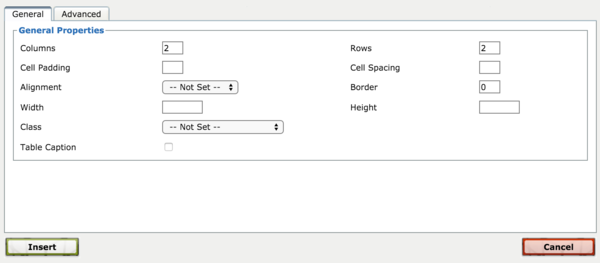
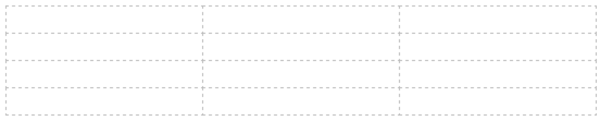
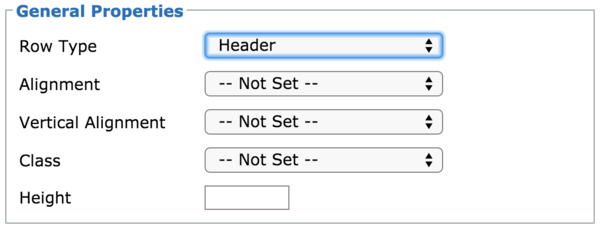
  • Use table markup for data tables. If you have tabular data, make sure it’s presented as an HTML table, with column and row headers.
  • Do not use tables for layout. Look for other ways to achieve the desired layout using the authoring tool options or adding styles using CSS.

You can make use of editor toolbars to help you add headings, tables, and lists. The following example shows the semantic markup options using OpenScholar's editor toolbar. Use the menu to create headings, and use the list controls to create bulleted and numbered lists.

Toolbar

Testing

Use an inspection tool, like the Web Developer Toolbar, to display structural elements:

  • Check each section heading on the page. Is it identified in code as a heading? Is the heading given an appropriate level of hierarchy for the page structure?
  • Check each list on the page. Is it identified in code as a list?
  • Are data tables marked up as tables, with row and column headers?
  • Are tables used for layout purposes?

Resources

✎ Technique: Building tables

The <table> element is for data that one might find in a spreadsheet, consisting of rows and columns of cells. Browsers provide this mechanism to display table structures and to convey table data to assistive technologies. It's important to ensure that the editing process allows identifying row and column headers so that screen reader users can access the meaning of each data cell by understanding what row and column it appears in.

In WYSIWYG editors such as the one provided in Open Scholar, it's possible to create HTML tables using the table tool.

Example

We are going to build an accessible table for different foods categorized by food group using Open Scholar's editor. This table will have three columns with the column head

To begin, we need to insert a basic table. We create our headers, and add rows as we progress. First, choose the Insert/Edit table option from the bottom row of the WYSIWYG toolbar. This opens a new window that should look like this:

The form for adding rows and columns to a table.

Use the form to add 3 columns and 4 rows, then press Insert to add the table to your work. You should see something like this:

Empty table with cells marked out with dashed lines.

Now we need to make the header row. Without a header row, a table isn't readable or accessible because there's no header to label the contents of each column. Click inside the first row, and then find the tool to the right of the table tool (in the toolbar) labeled Table Row Properties. You need to switch the row type to "header":

Table row options form with a Row Type select element set to header

Back in the main WYSIWYG pane, you can now add the table header text: "dairy", "meat" and "vegetables". You can differentiate this header text from the subject rows by selecting it and making it bold.

dairy meat vegetables
milk chicken spinach
butter fish carrots
yogurt turkey onions

Regrettably, Open Scholar's WYSIWYG editor does not generate quite the correct markup for accessible tables, so you'll have to do a little coding to get things straight. If you click the disable rich-text link at the bottom of the body WYSIWYG pane, you should see your table, with a table header that looks like this:


<thead>
<tr>
<td><strong>dairy</strong></td>
<td><strong>meat</strong></td>
<td><strong>vegetables</strong></td>
</tr>
</thead>

You need to change the <td> elements here into <th> (table header) element, like so:


<thead>
<tr>
<th><strong>dairy</strong></th>
<th><strong>meat</strong></th>
<th><strong>vegetables</strong></th>
</tr>
</thead>

With these correct column header elements in place, screen readers can use the content of the column headers to help describe the column content. For example, on navigating to the “milk” cell, the screen reader will announce "dairy: milk." This is better than trying to remember which column you're in.

✎ Technique: Identifying lists of content

Lists are collections of related content. For example, a navigation bar is a list of links or a set of instructions may be an ordered (numbered) list. Clearly identifying a set of items as a list helps people understand that relationship. When you include a list in your page content, this relationship needs to be conveyed visually, and it also needs to be conveyed to people using screen readers.

Examples

✗ Bad example

It's perfectly possible to create a structure that looks like a list by using characters to mimic bullets:

* Mars

* Jupiter

* Saturn

This might look like a list, but to screen readers, it's just three lines of plain text, each preceded by an asterisk. 

(Note: Some content editing systems, like Markdown or MediaWiki, will convert asterisks into proper list items when you publish the content. But you should check that this will happen before writing lists!)

✓ Good example

When you use an online editor or word-processing software to write lists, make sure you use its list option to create lists. When the content is published, it will be converted to a proper list, using HTML that’s similar to this example:

Here, an unordered list is represented by a <ul> element for the list and  <li> elements for each item:


<ul>
  <li>Mars</li>
  <li>Jupiter</li>
  <li>Saturn</li>
</ul>


This list will be identified by screen readers. For example, when a screen reader user enters the list, it will say something like "list, item 1, one of three." On leaving the list, some screen readers will announce "out of list." In JAWS, it's possible to navigate between list items using dedicated keyboard shortcuts: "i" to go forwards and SHIFT + "i" to go backwards.

Video: Creating lists in WYSIWYG editors


Video: Creating lists in WYSIWYG editors


✎ Technique: Identifying headings

Headings are important orientation aids, and they help people quickly identify the content on your page. When headings are correctly identified, they also allow screen-reader users to quickly navigate from heading to heading using the screen reader's heading navigation functionality.

The best way to do this is to ensure that headings are identified in HTML. When using a web-content editor or a word-processing application, you can do this by making use of the heading options in the styles menu. 

Examples

✗ Bad example

It's possible to make text visually resemble a heading by making it appear more prominent than the surrounding text. In this example, the word “Mars” looks like a heading, but it’s actually plain text that has been made bold and larger.

Mars

After Earth, Mars is the next furthest planet from the Sun.

This "fake heading" won't be identified by a screen reader as a heading because there's no HTML identifying it as such. Also, if someone needed to change the appearance of headings to make them easier to read, this heading wouldn't change.

✓ Good example

In this example, visually, this content looks the same. However, the word "Mars" is now a proper heading. It's identified in HTML with an <h5> element, indicating it's a Level 5 heading.

Mars

After Earth, Mars is the next furthest planet from the Sun.


The level of heading reflects your page content's structure. In practice, on most web pages, you'll likely only need between one and three heading levels. Try to ensure that each heading level accurately identifies the structure of your page content: The level should reflect the depth of a section. For example, an <h5> heading would denote a subsection within an <h4> headed section.

This helps screen-reader users navigate by headings of a specific level. For example, in JAWS, it's possible to navigate to headings using either the "h" (next heading) or "5" (fifth level heading shortcut) keys. When a user arrives at the heading, whether by browsing sequentially or by using a shortcut, JAWS will say "Mars, fifth level heading."

Video: Headings in WYSIWYG editors


Video: Headings in WYSIWYG editors


✎ Technique: Heading structure

The heading levels (1-6) are often considered a way of describing and determining the “importance” of a heading, with h1 being the most important. This might be reflected in the visual appearance of headings—higher-level headings typically appear as bigger and bolder text than lower-level headings.

But you can't just put an “important” heading anywhere. Its heading level relates to how much content it refers to, and that has to do with structure.

Reflecting structure accurately allows screen-reader users to use their screen reader's heading-navigation feature to navigate by heading level, building up an idea of document structure. It also ensures that, for people who use custom stylesheets, heading structure is preserved even when the appearance of headings is changed.

Examples

Good example

Heading levels determine the structure of a page, and this structure depends on sections belonging to subsections. Using heading levels to describe this relationship is quite simple: An h2 would head a section that may contain subsections. To show that these are subsections, you would code their headings with an h3.


<h2>Section Heading</h2>
<!-- section content here -->
  <h3>Subsection heading</h3>
  <!-- subsection content here -->
  <h3>Another subsection heading</h3>
  <!-- subsection content here -->

In a table of contents, this structure might be illustrated using indentation, like so:

  • Section Heading
    • Subsection heading
    • Another subsection heading

Bad example

To create a coherent structure, you should not skip heading levels. That is, a section headed with an h3 should not contain immediate child subsections headed with h5 or h6.


<h3>Section heading</h3>
<!-- section content here -->
  <h5>Subsection heading</h5>
  <!-- does this content belong directly to the h3 section or not? -->
  <h6>Another subsection heading</h6>
  <!-- this will be considered a subsection of the h5 section headed above -->